Windows Subsystem for Linux (WSL), also known as Bash on Ubuntu on Windows, is nothing short of a game-changer! If you are ready to check out what the hype is all about, read on.
Installation
Before you can install WSL, you need to do a couple of things:
- Turn on Developer Mode (Settings > Update and Security > For developers)
- Enable the Windows Subsystem for Linux feature in Windows (Turn Windows features on or off)
After you have done this you need to reboot your computer.
Open up a command prompt (cmd or PowerShell), and type in the command
bash
Follow the prompts on screen and the Ubuntu image will be downloaded and installed, and you will be asked to create a username and password. Note that this user have no relationship with your Windows user account.

After everything is set up you will be inside Ubuntu, in your home folder (in Linux this is represented by the tilde character: ~)
Note that the Linux home folder is not the same as your Windows home folder, and is actually located at “%localappdata%\lxss\“.
The Ubuntu Package Manager
The easiest way of installing new software, and to update both the system and installed packages are to use the built-in package manager in Ubuntu, called apt-get.
Update packages
The following commands will update all installed packages in Ubuntu:
sudo apt-get update
sudo apt-get upgrade
Install packages
The following command is used to install new packages:
sudo apt-get install <package name>
Uninstall packages
The following command is used to uninstall a package:
sudo apt-get remove <package name>
Change Locale
If you are installing on a Windows installation with a non-English locale, chances are you will get Ubuntu set up with this locale as well.
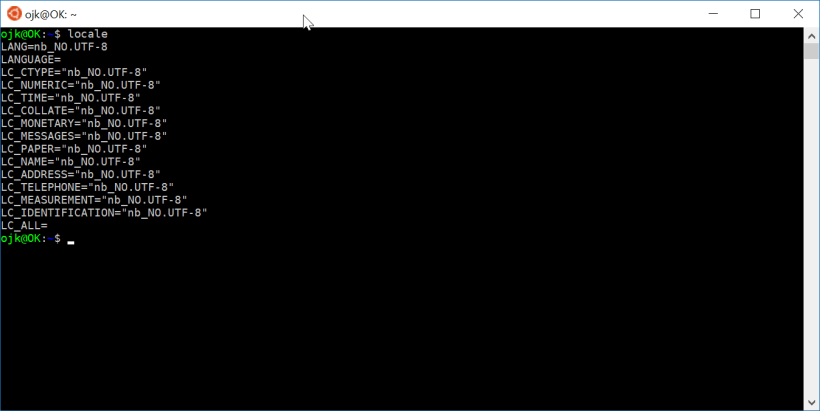
To see the currently configure locale settings:
locale
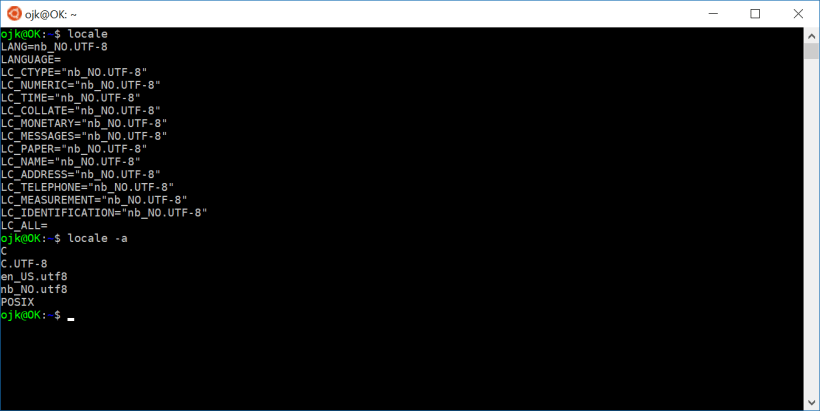
To list all the available locales on your system:
locale -a
To change locale, you can use the update-locale command. For instance, if you just want to change the language to US English:
sudo update-locale LANG=en_US.utf8
You need to exit and restart WSL for these changes to take effect.
Git
The version of Git available in apt-get are most likely not the newest version available. To be able to update git to the newest version, you need to add a new repository to apt-get:
sudo apt-add-repository ppa:git-core/ppa
You can now update to the newest version:
sudo apt-get update
sudo apt-get install git

Changing the shell
The default shell in WSL is bash. There exists other shells to choose from if you want change things up. Two popular choices are zsh and fish.
If you want to install the newest version of fish, they have a repository you should add. The version in the Ubuntu repositories are some versions behind:
sudo apt-add-repository ppa:fish-shell/release-2
sudo apt-get update
sudo apt-get install fish
The same is true of zsh, but I couldn’t find any “official” PPA for zsh.
Changing the default shell
Usually changing the default shell in Linux is as simple as running a simple command. But when using WSL it’s unfortunately not as simple. Since the entry-point to WSL is bash.exe we will always start bash. The trick is to run bash with the -c parameter to get it to immediately launch another shell:
bash ~ -c fish
This will launch WSL with the fish shell in the home folder. Just create a new Windows shortcut and add the following as the target:
C:\Windows\System32\bash.exe ~ -c fish
Replace fish with whatever shell you want.
Customizing the shell
There exists tons of ways of customizing your Linux shell of choice. I’m not going to go into specifics in this introductory post, as there exists a lot of information and examples online if you search for it. I will mention though that there exist a popular choice for the zsh shell called oh-my-zsh. A similar project exists for the bash shell; bash-it, and fish; oh-my-fish. These are worth checking out if you want something other than the default look for each shell.
Colors
If you are in the habit of starting bash from PowerShell, you might have seen that the default colors in WSL are not exactly ideal together with the default blue background.

You have limited options for customizing the colors in the default console application in Windows. I would highly recommend to install another console application. I recommend trying out ConEmu which lets you change color themes easily.

SSH
Being able to use ssh from the command line is almost reason enough to start using Windows Subsystem for Linux.
The first thing you should do is to create your default key pair:
ssh-keygen
Just accept the default values (unless you want to set a password for the key, in that case enter a password when prompted for it).
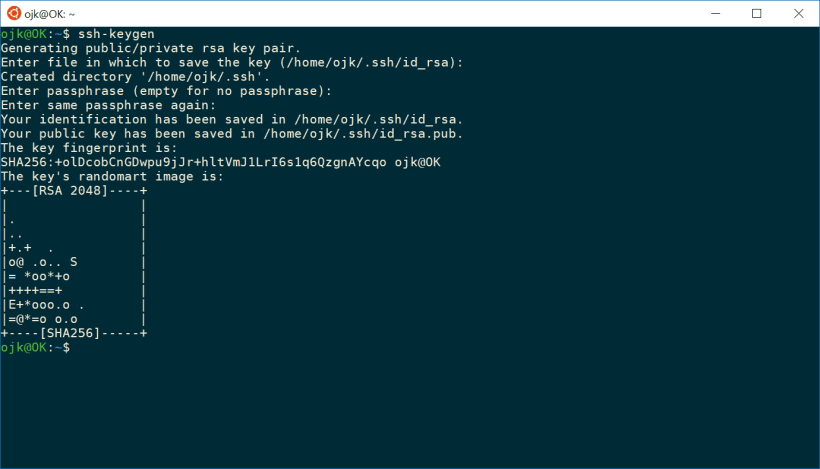
This will create a key pair (id_rsa) and save it in a hidden folder (.ssh) in your home folder.

You don’t have to, but it’s customary to store all your keys in ~/.ssh. To use ssh to connect to a computer:
ssh user@server -i ~/.ssh/my_key.pub
Linux 101
To get you started in Linux I’m including some small tips and tricks that might be nice for complete beginners.
Getting help
Most commands in Linux will support the parameter –help, which will list out information about the command in question.
Case Matters
In Linux the casing matters. So for instance, the file mytextfile.txt is not the same as Mytextfile.txt.
Variables
Setting variables in Linux is done as follows:
MY_VARIABLE=value
Referencing variables:
$MY_VARIABLE
If you want to set global variables, you need to use the export keyword:
export VAR=test
VAR2=test2
export $VAR2
Both of these variables are now available in the global scope.
LS
If you are used to using ls in PowerShell, you might notice that the default view in Linux when using ls is a bit different than what you are used to. To list files with more information:
ls -l
To also show hidden files and folders:
ls -la
Elevated access
Running some commands, or editing some files, will need elevated access. The way this is done in Linux is to use the sudo command (SuperUser DO), for instance:
sudo apt-get update
If you end up doing a lot of actions that needs elevated access, and are tired of writing sudo before each command, you can change the user to the Super User:
sudo su
To return to the normal user:
exit
Reading and editing files
To read the contents of a file:
cat file.txt
For editing files you have a couple of options. The easiest is probably to use nano:
nano file.txt
Nano have a helpful bar at the bottom, giving you hints to common operations. The other option is vi(m):
vi file.txt
vim file.txt
Opening up a file in vi for the same time can make anyone despair. Here are some helpfull hints to survive vi:
- Press <Insert> to enable editing mode (–INSERT– should be shown at the bottom of the screen)
- Pressing <Insert> while in insert-mode will change mode to –REPLACE–
- While in Insert or Replace mode, press <Esc> to return to the normal mode
- Press colon (:) to enter command mode
- While in command mode:
- q – quit without saving
- q! – force quit
- w – save
- wq – save and quit
- wq! – force save and quit
There are of course a ton of other options for vi, but these should at least enable you to do basic stuff without suffering a heart attack!
Conclusion
That’s it for now. I encourage you to trying it out your self, and getting familiar with Linux.
Good luck.
Note that I’m by no means a Linux expert, so if notice anything wrong, or know of any other tips and tricks, please let me know in the comments section below!
